Professional real estate photos are high quality interior and exterior images, shot with a DSLR or mirrorless camera and edited for exposure, color, and perspective, often paired with drone, twilight, or 3D tour add-ons. The core benefit is speed and price: homes with strong photos can sell up to 32% faster, and since 85% of buyers say photos are the deciding factor in which homes they'll even view, the shoot is often the highest leverage dollar a seller spends. What follows covers prep, gear, pricing, and how to hire.
TL;DR:
- Professional real estate photos typically include comprehensive interior and exterior shots, with added options like drone, twilight, or 3D tours for specific property types.
- A high-quality, professionally taken listing can sell up to 32% faster, with 85% of buyers citing photos as the deciding factor in which homes to view.
- Preparing a home for photos involves decluttering, staging key areas, and ensuring consistent lighting, with professional camera settings focused on straight verticals and balanced exposure.
- Twilight and drone photos are valuable mainly for upscale, waterfront, or acreage properties, but are unnecessary for small townhouses with limited views.
- Pricing generally starts in the low hundreds for standard shoots, with extra costs for twilight, drone, or virtual tours, making proper planning essential for maximum impact.
Table of Contents
- What Do Professional Real Estate Photos Include?
- Is Hiring a Professional Photographer Worth It Over DIY?
- How Do You Prepare a Home for a Photo Shoot?
- What Camera Settings and Composition Rules Do Pros Use?
- When Do Twilight Shots and Drone Photos Actually Pay Off?
- What Should You Expect from Editing and File Delivery?
- How Much Do Professional Real Estate Photos Cost?
- How Do You Hire and Brief a Real Estate Photographer?
- Beams Realty Group's Perspective on Photography and Listings
- Get Your Listing Photo-Ready with a Coordinated Plan
- Sources
- FAQ
What Do Professional Real Estate Photos Include?
A standard shoot covers every room, the exterior front and back, and a handful of feature shots, all captured in RAW and delivered as edited high resolution JPEGs. Add-ons exist because different properties have different selling points, and paying for the wrong one wastes money.
- Drone photography earns its cost on properties with acreage, waterfront, or a distinctive roofline. It's wasted on a townhouse with no view.
- Twilight images, shot at dusk or converted digitally from a daytime photo, work best as a single hero shot for the listing thumbnail.
- 3D virtual tours matter most for out-of-town buyers or higher-priced listings where people want to walk the layout before booking a showing.
- Video walkthroughs help on unique floor plans where photos alone can't convey flow.
A 3D virtual tour rarely makes sense for a starter condo on a tight timeline, but it can be the difference maker for a custom build.
Is Hiring a Professional Photographer Worth It Over DIY?
The gap is measurable, not just aesthetic. Pros bring wide-angle lenses, off-camera lighting, and HDR bracketing that flatten the harsh contrast a phone camera can't handle, plus they know how to correct converging verticals so rooms look square instead of tilted.
- Listings shot professionally tend to sell faster, and homes with weak photos often sit while 90% of buyers who are searching online scroll right past them.
- A smartphone, a cheap tripod, and a clip-on wide lens can get a reasonable DIY result for a low-budget FSBO sale, especially for interior shots in good natural light.
- The smart hybrid: hire a pro for the twilight exterior and any drone work, then shoot straightforward bedrooms yourself if the budget is tight.
How Do You Prepare a Home for a Photo Shoot?
Photographers charge for their time behind the camera, not for tidying your kitchen counter. A cluttered scene either gets edited out (costing you a revision fee) or shows up in the final gallery looking exactly as messy as it did that morning.
- Kitchen: clear counters down to two or three items, hide dish towels and pet bowls, and empty the sink.
- Bathrooms: close every toilet lid, remove personal toiletries, and hang a fresh matching towel.
- Living areas: straighten books on shelves, fluff pillows, and remove anything overtly personal like family photos or political items.
- Bedrooms: make beds tight, clear nightstands, and tuck away laundry baskets.
- Lighting: wipe down light fixtures and swap any mismatched bulbs so every lamp in a room reads the same color temperature.
- Exterior: move cars off the driveway, coil hoses, and stow trash and recycling bins out of frame.
NAR's own staging guidance backs nearly every item on this list. Finish the heavy cleaning the night before, then do a quick walkthrough the morning of the shoot to catch anything that shifted overnight, like a chair pushed out of place. For a deeper room-by-room plan, staging on a budget covers furniture placement too.
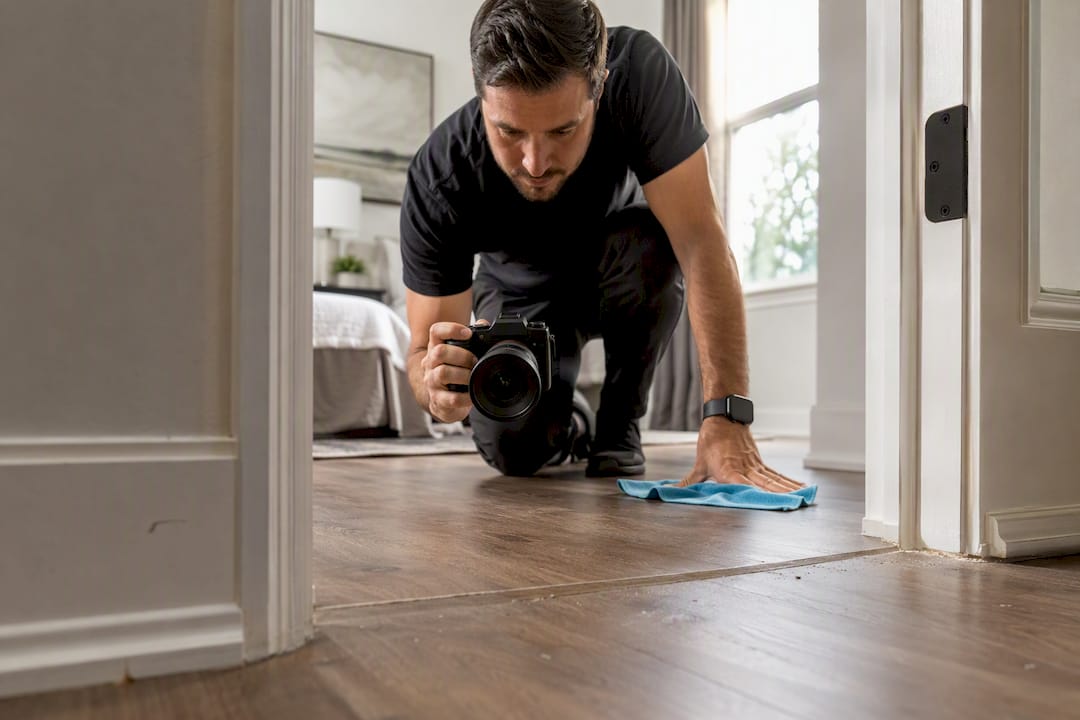
Pro Tip: Do a final "camera pass" ten minutes before the photographer arrives: get on your knees in each doorway and look at the room from that low angle. Wide-angle lenses catch dust bunnies and scuff marks a standing eye-level glance misses entirely.
What Camera Settings and Composition Rules Do Pros Use?
Gear matters less than most sellers assume, but for anyone shooting their own interiors or vetting a hired photographer's approach, a few standards separate professional results from snapshots.
- A sturdy tripod is non-negotiable for interiors, since it allows longer exposures at low ISO without blur.
- A wide-angle lens (16 to 24mm on a full-frame body) shows a room's flow, but pros use it sparingly. Too wide and rooms look distorted or falsely spacious.
- Bracketed exposures blended into HDR handle the contrast between a dim room and a bright window, which a single exposure can't manage.
- Interiors typically shoot around f/8 to f/11 for depth of field, ISO 100 to 400, with three to five bracketed frames per shot.
- A remote shutter or timer avoids camera shake, and small LED panels fill dark corners without harsh flash shadows.
Perspective control matters as much as lighting. Shooting from tripod chest height keeps verticals straight and prevents the "falling backward" look that comes from tilting a lens up. Pros correct any remaining lean in post rather than relying on extreme wide-angle distortion to make a room look bigger than it is. Most shoots run 25 to 40 total images across a typical three or four bedroom home, with two to three angles per main room.
When Do Twilight Shots and Drone Photos Actually Pay Off?
A twilight hero image, with warm interior lights glowing against a blue dusk sky, tends to stop people scrolling faster than a daytime exterior ever will. You have two ways to get one: shoot it live at golden hour or convert an existing daytime photo digitally.
- Real on-site twilight shoots deliver more authentic color and ambiance and are usually worth the extra cost on higher-end listings.
- Virtual twilight conversions work well when the original daytime shot is already clean and well-composed, and they're cheaper and faster to turn around.
- Drones make sense for acreage, waterfront, or a neighborhood context shot. Confirm your photographer holds proper commercial drone certification before booking any aerial work.
- For interiors, avoid mixing daylight from windows with warm indoor bulbs in the same frame. That clash of color temperatures is one of the most common amateur mistakes.
What Should You Expect from Editing and File Delivery?
A professional edit isn't a filter. It's targeted corrections: straightening verticals, balancing exposure and white balance, adjusting color, and light retouching on scuffs or cords. Virtual staging, digitally furnishing an empty room, is a common optional add-on.
- Expect delivery of high-resolution JPEGs sized for MLS upload, plus a web-optimized set for social media and email.
- RAW master files are sometimes available on request, usually for an added fee, since most photographers retain them.
- Standard turnaround runs 24 to 48 hours; rush delivery typically costs extra.
- Get your booking agreement in writing covering usage rights, revision limits, and exactly which files you're entitled to keep.
How Much Do Professional Real Estate Photos Cost?
Pricing varies by market and package, but most standard shoots for an average single-family home land in the low hundreds, with twilight, drone, or 3D tour add-ons each stacking on additional cost.
- A basic package (interior and exterior stills, light editing) covers most homes under 2,500 square feet.
- Add twilight, drone, or a virtual tour individually rather than bundling if your budget is tight and one add-on clearly matters more than the others.
- Order your gallery strategically: hero exterior or twilight shot first, then living areas, kitchen, primary bedroom, remaining bedrooms, bathrooms, and closing with standout details like a fireplace or backyard.
Given that 85% of buyers weigh photos most heavily in deciding which listings to tour, a few hundred dollars on photography is small next to what a faster sale or a stronger offer is worth. For a fuller view of how photos fit into overall pricing strategy, see maximizing sale proceeds.
How Do You Hire and Brief a Real Estate Photographer?
Ask direct questions before booking, and don't skip this step just because a portfolio looks polished online.
- Ask to see full galleries from at least two recent listings, not just their best single shots.
- Ask specifically about twilight and drone experience, and request proof of drone certification if aerials are part of the job.
- Confirm whether RAW files are included or available for an extra fee, and get licensing and usage terms in writing.
- Watch for red flags: no written contract, a portfolio with wildly inconsistent quality, or reluctance to guarantee file formats you need for MLS upload.
- Send a short brief covering square footage, standout features, your preferred shoot window, and priority shots (the backyard, a renovated kitchen, a view).
Beams Realty Group's Perspective on Photography and Listings
. In our experience coordinating listings, photography works best when it's planned alongside staging and pricing strategy, not treated as an afterthought the week before launch. We schedule shoots after staging is finished and pricing strategy is set, so the gallery matches the story the listing is telling.
— Myra
Get Your Listing Photo-Ready with a Coordinated Plan
Photography is best built into the listing plan itself rather than treated as a separate vendor you have to manage alone. This means having one point of contact handling staging guidance, scheduling the shoot, and lining up add-ons like twilight or a virtual tour, so nothing falls through the cracks between "the house is ready" and "the photos are live."
When you reach out through the Beams Realty Group listing services page, expect a conversation about your timeline, your home's standout features, and which photo add-ons are actually worth your money versus which ones you can skip. From there, we coordinate the staging checklist, book the right photography package for your property type, and fold the finished gallery into a full marketing plan built to get more showings, faster. If you're weighing repairs before listing too, our pre-listing inspection playbook is worth a look first. Reach out to get your photo timeline started.
Sources
FAQ
How Much Do Realtors Pay for Professional Photos?
Most agents budget a few hundred dollars for a standard shoot, with twilight, drone, or 3D tour add-ons pricing separately on top of that base package.
How Do You Take Professional Photos for Real Estate?
Use a tripod at chest height, shoot in RAW with bracketed exposures for HDR, keep a wide-angle lens used sparingly, and correct verticals so walls and doorframes read straight.
What Is the 3-3-3 Rule in Real Estate?
Definitions vary depending on the source, and it isn't a standardized photography rule. Some agents use it to describe pricing or negotiation tactics rather than image counts, so treat any specific claim about it with caution.
What Photo Sold for $4.3 Million?
This isn't a documented, verifiable photography case, and there's no reliable source confirming a specific image tied to that sale price.
Should I Hire a Pro or Take Photos Myself?
A hybrid approach often works best: hire a professional for exterior twilight and drone shots where quality differences show most, and consider DIY interior shots only if your budget is genuinely tight and lighting is strong.